[ad_1]
Whether you are utilizing Windows 10, Windows 11, or rockin’ it old style with Windows 7, capturing the content material in your display screen can come in useful in quite a lot of conditions.
Whether that you must save info for later, collaborate with others, or share troubleshooting info, screenshots are a strong instrument that may be value a thousand phrases. In this information, we’ll present you one of the best methods to take screenshots with Windows built-in instruments and thru one of the best third-party instruments for the job.
The Basics: Using the Print Screen Key
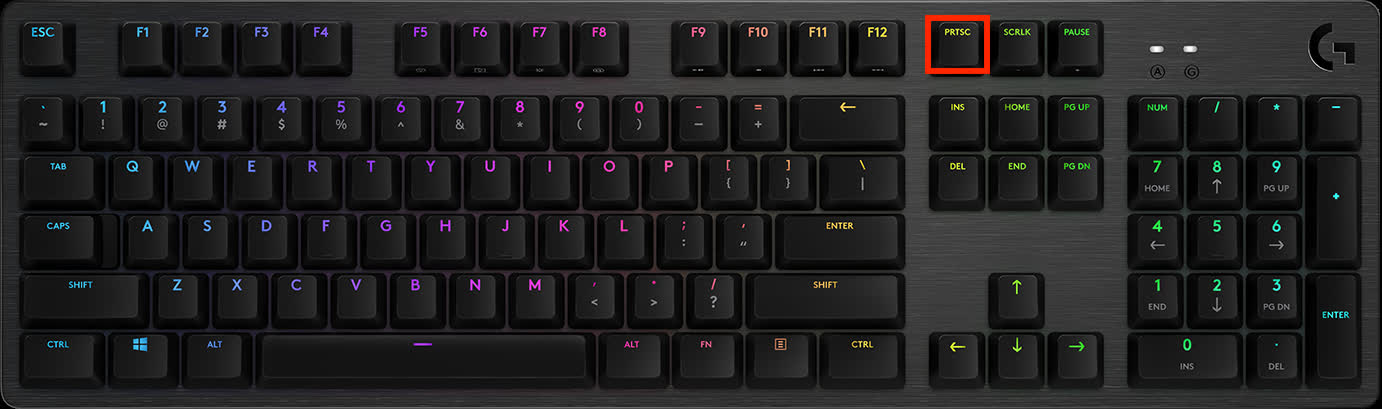
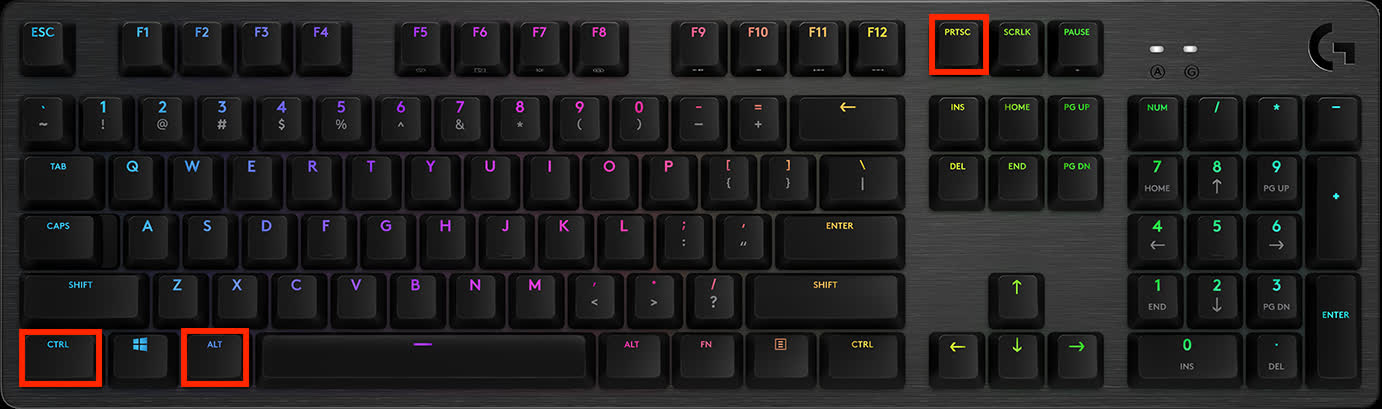
The easiest strategy to take a screenshot is to press the Print Screen key in your keyboard, which is normally abbreviated as PrtSc. This will save what’s displayed in your PC display screen contained in the clipboard. If you are utilizing a laptop computer, it’s possible you’ll have to press Fn + PrtSc to get the identical consequence.
To crop, annotate, and save your display screen seize, you will have to stick it into an app like Paint or a picture editor of your selection. For quite simple enhancing, you should utilize Paint which is on the market in all Windows variations. Open Paint from the Start menu, after which press Ctrl + V in your keyboard to stick your screenshot. From there, you possibly can crop and edit your screenshot to your liking, or reserve it immediately by urgent Ctrl + S in your keyboard.
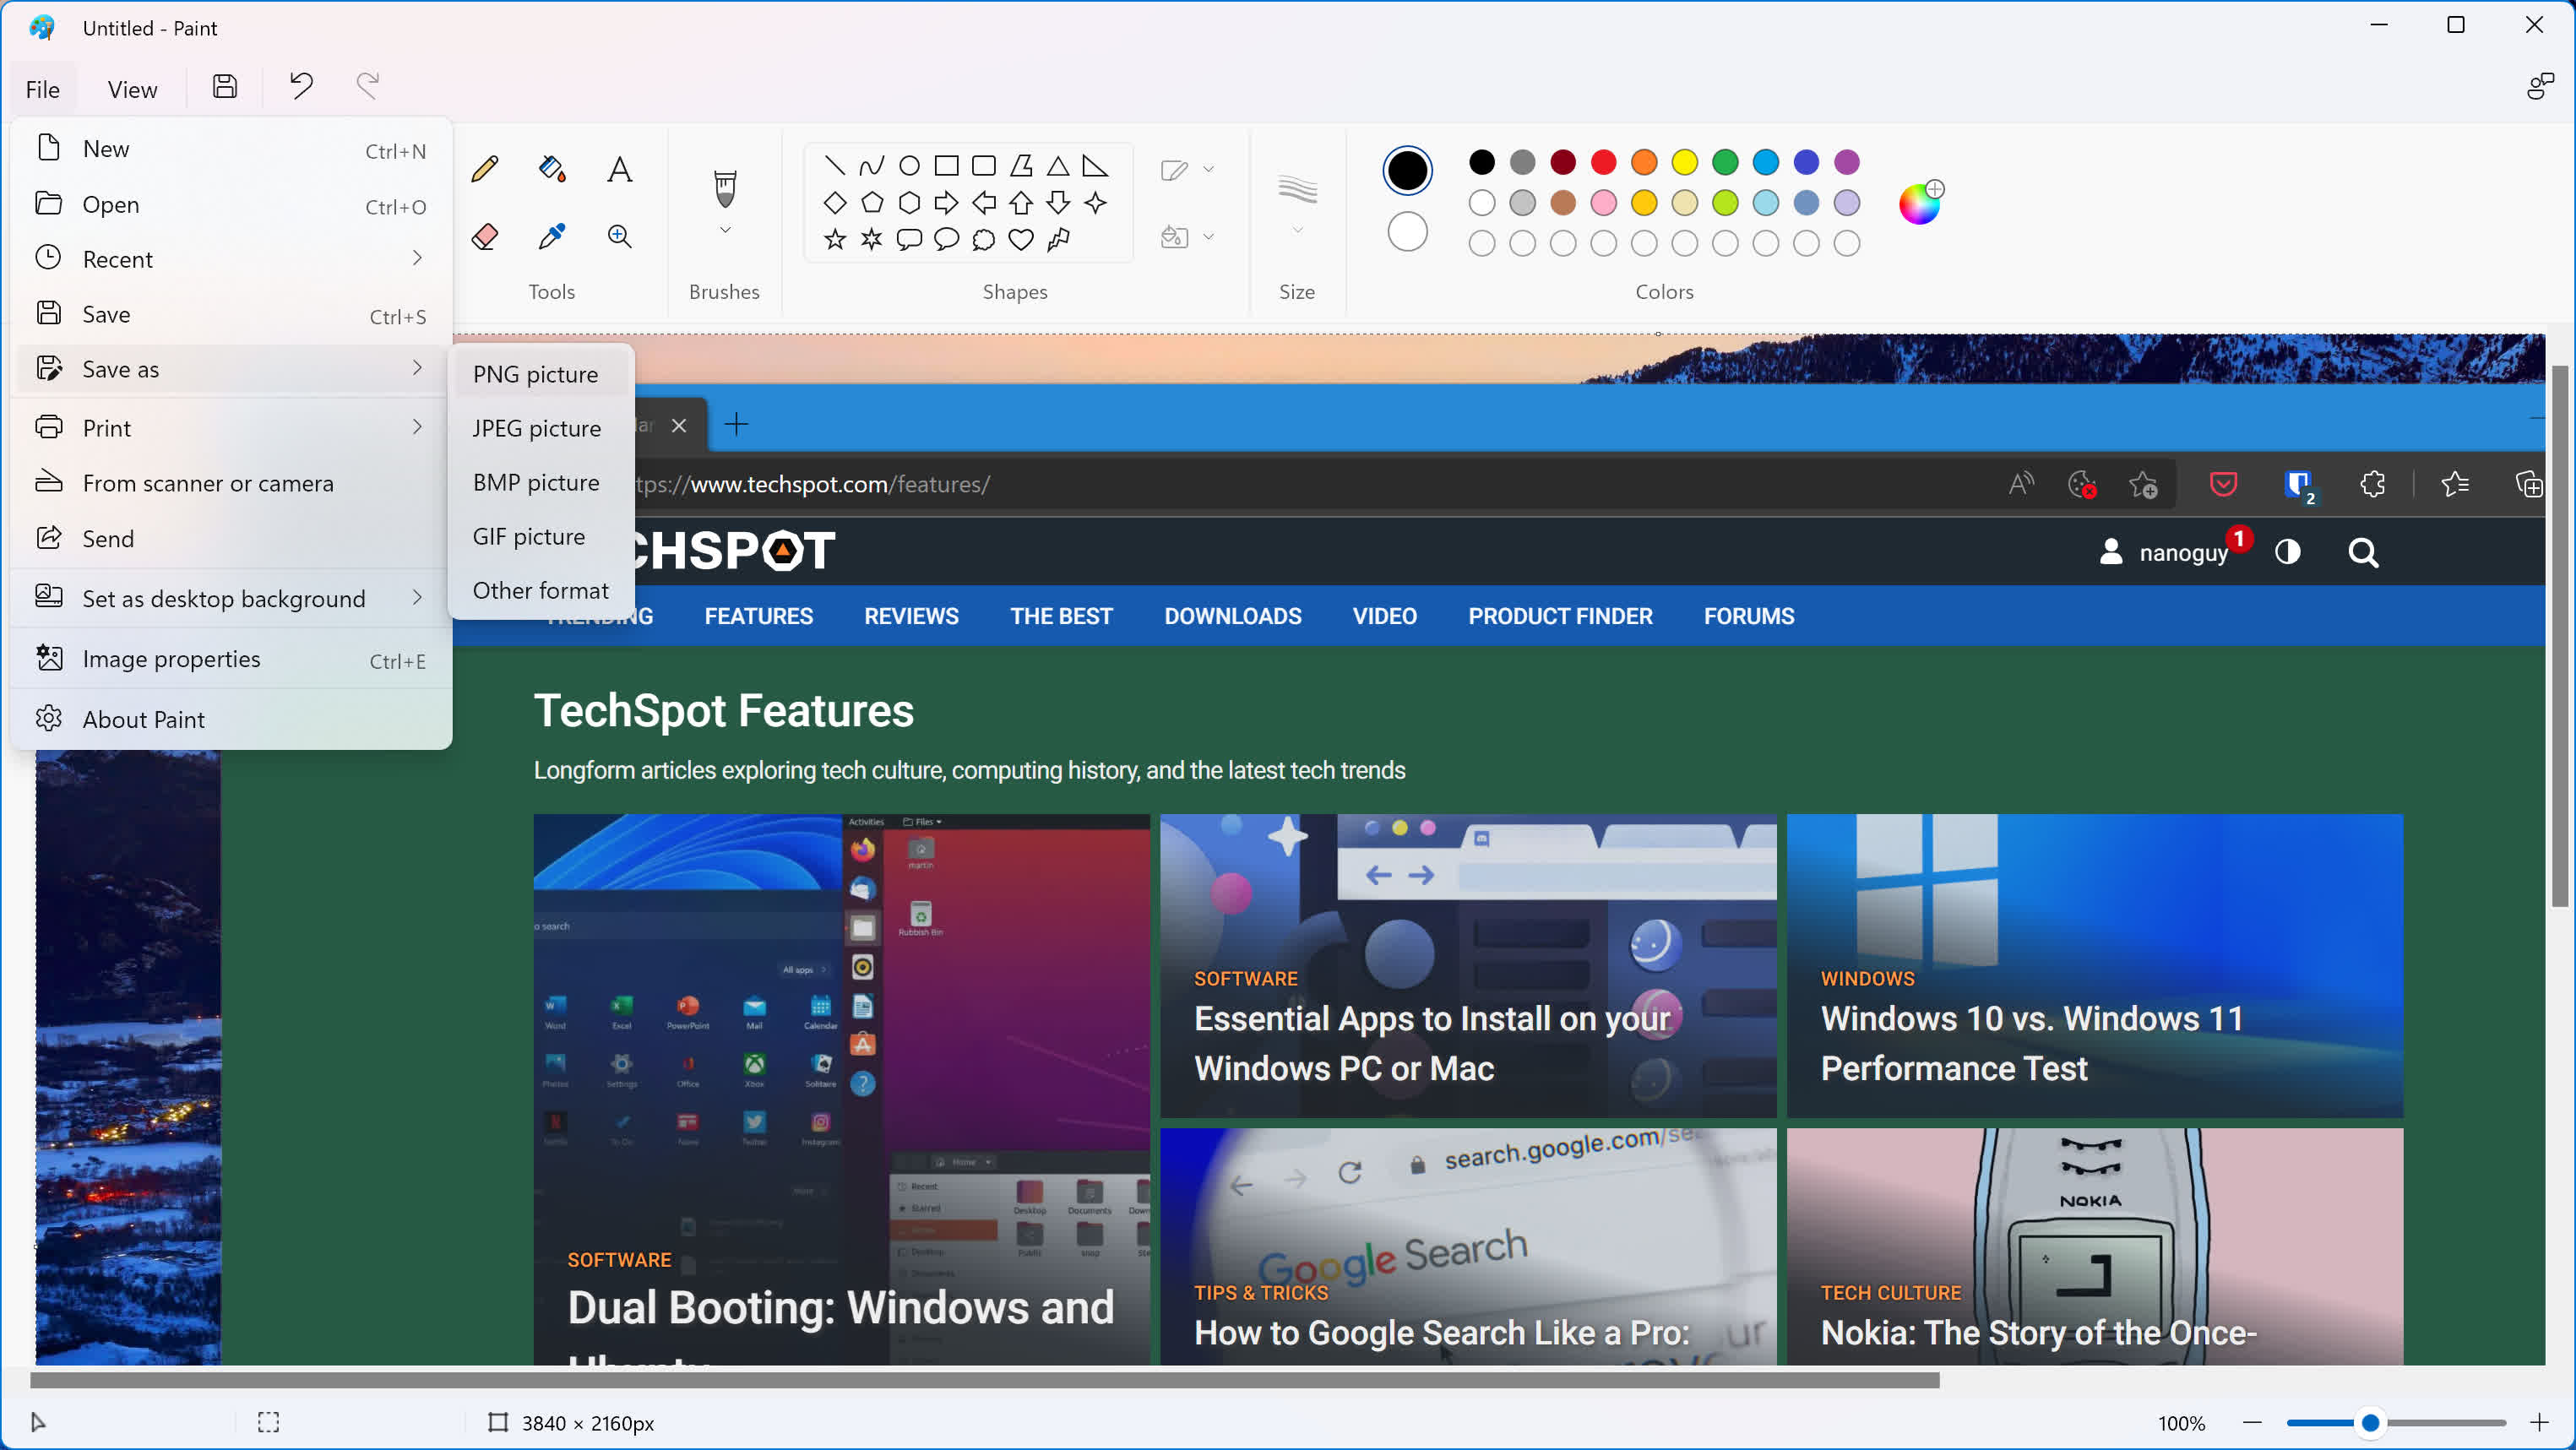
If what you captured is generally white house, textual content, graphs, tables, and app home windows, the PNG format, which is the default, will result in a sharper picture.
If what you captured is a body from a YouTube video, or a Zoom video, a scene from a sport, or a photograph, JPG can be more sensible choice, as it is going to produce a suitable trying seize with a smaller file dimension.
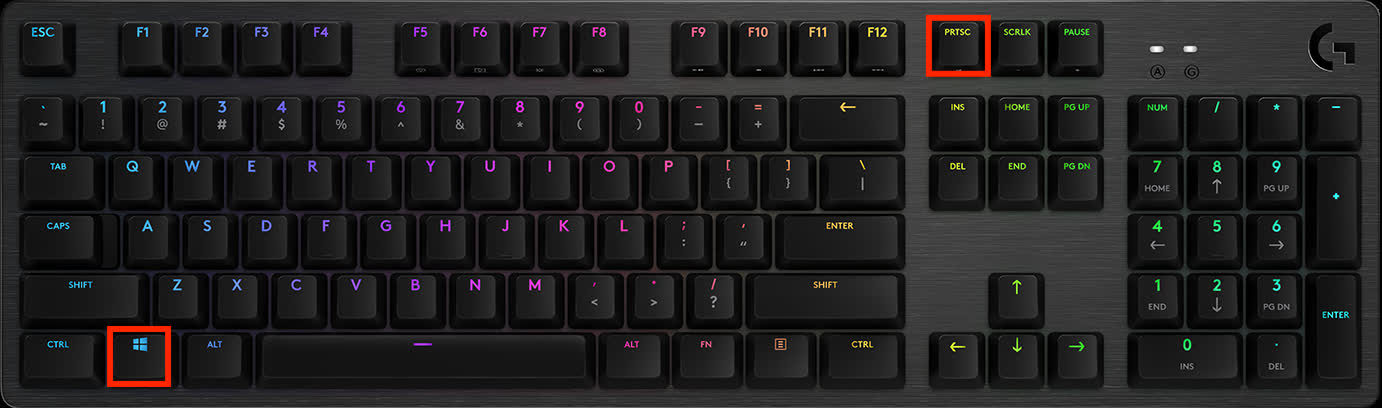
You can even seize a full display screen seize with none modifications by urgent Win + PrtSc.
This will immediately save the contents of your display screen as a PNG inside a folder referred to as Screenshots in your Pictures folder. This is helpful when that you must take a number of screenshots in fast succession.
To solely seize the contents of the energetic window, use Win + Alt + PrtSc. Then use Paint to reserve it as defined above.
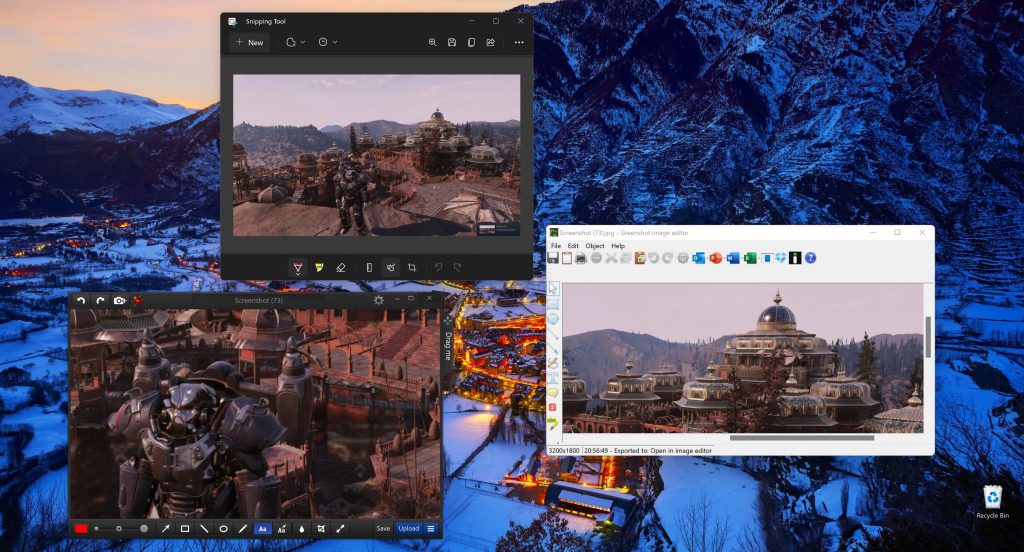
Alternatively, there’s a extra strong strategy to take screenshots in Windows — use both Snipping Tool (Windows 10) or Snip & Sketch (Windows 11). Both are supposed to provide you with prompt methods to annotate and crop your display screen captures.
To open Snipping Tool, look it up from the Start menu or press .

From there, you possibly can drag your cursor to pick out the realm of the display screen you need to be captured.
Alternatively, you should utilize the app to carry out a freeform snip by drawing any form round what you wish to seize.
You can then scribble or spotlight components in your seize utilizing the Snipping Tool, or copy it to a special app.
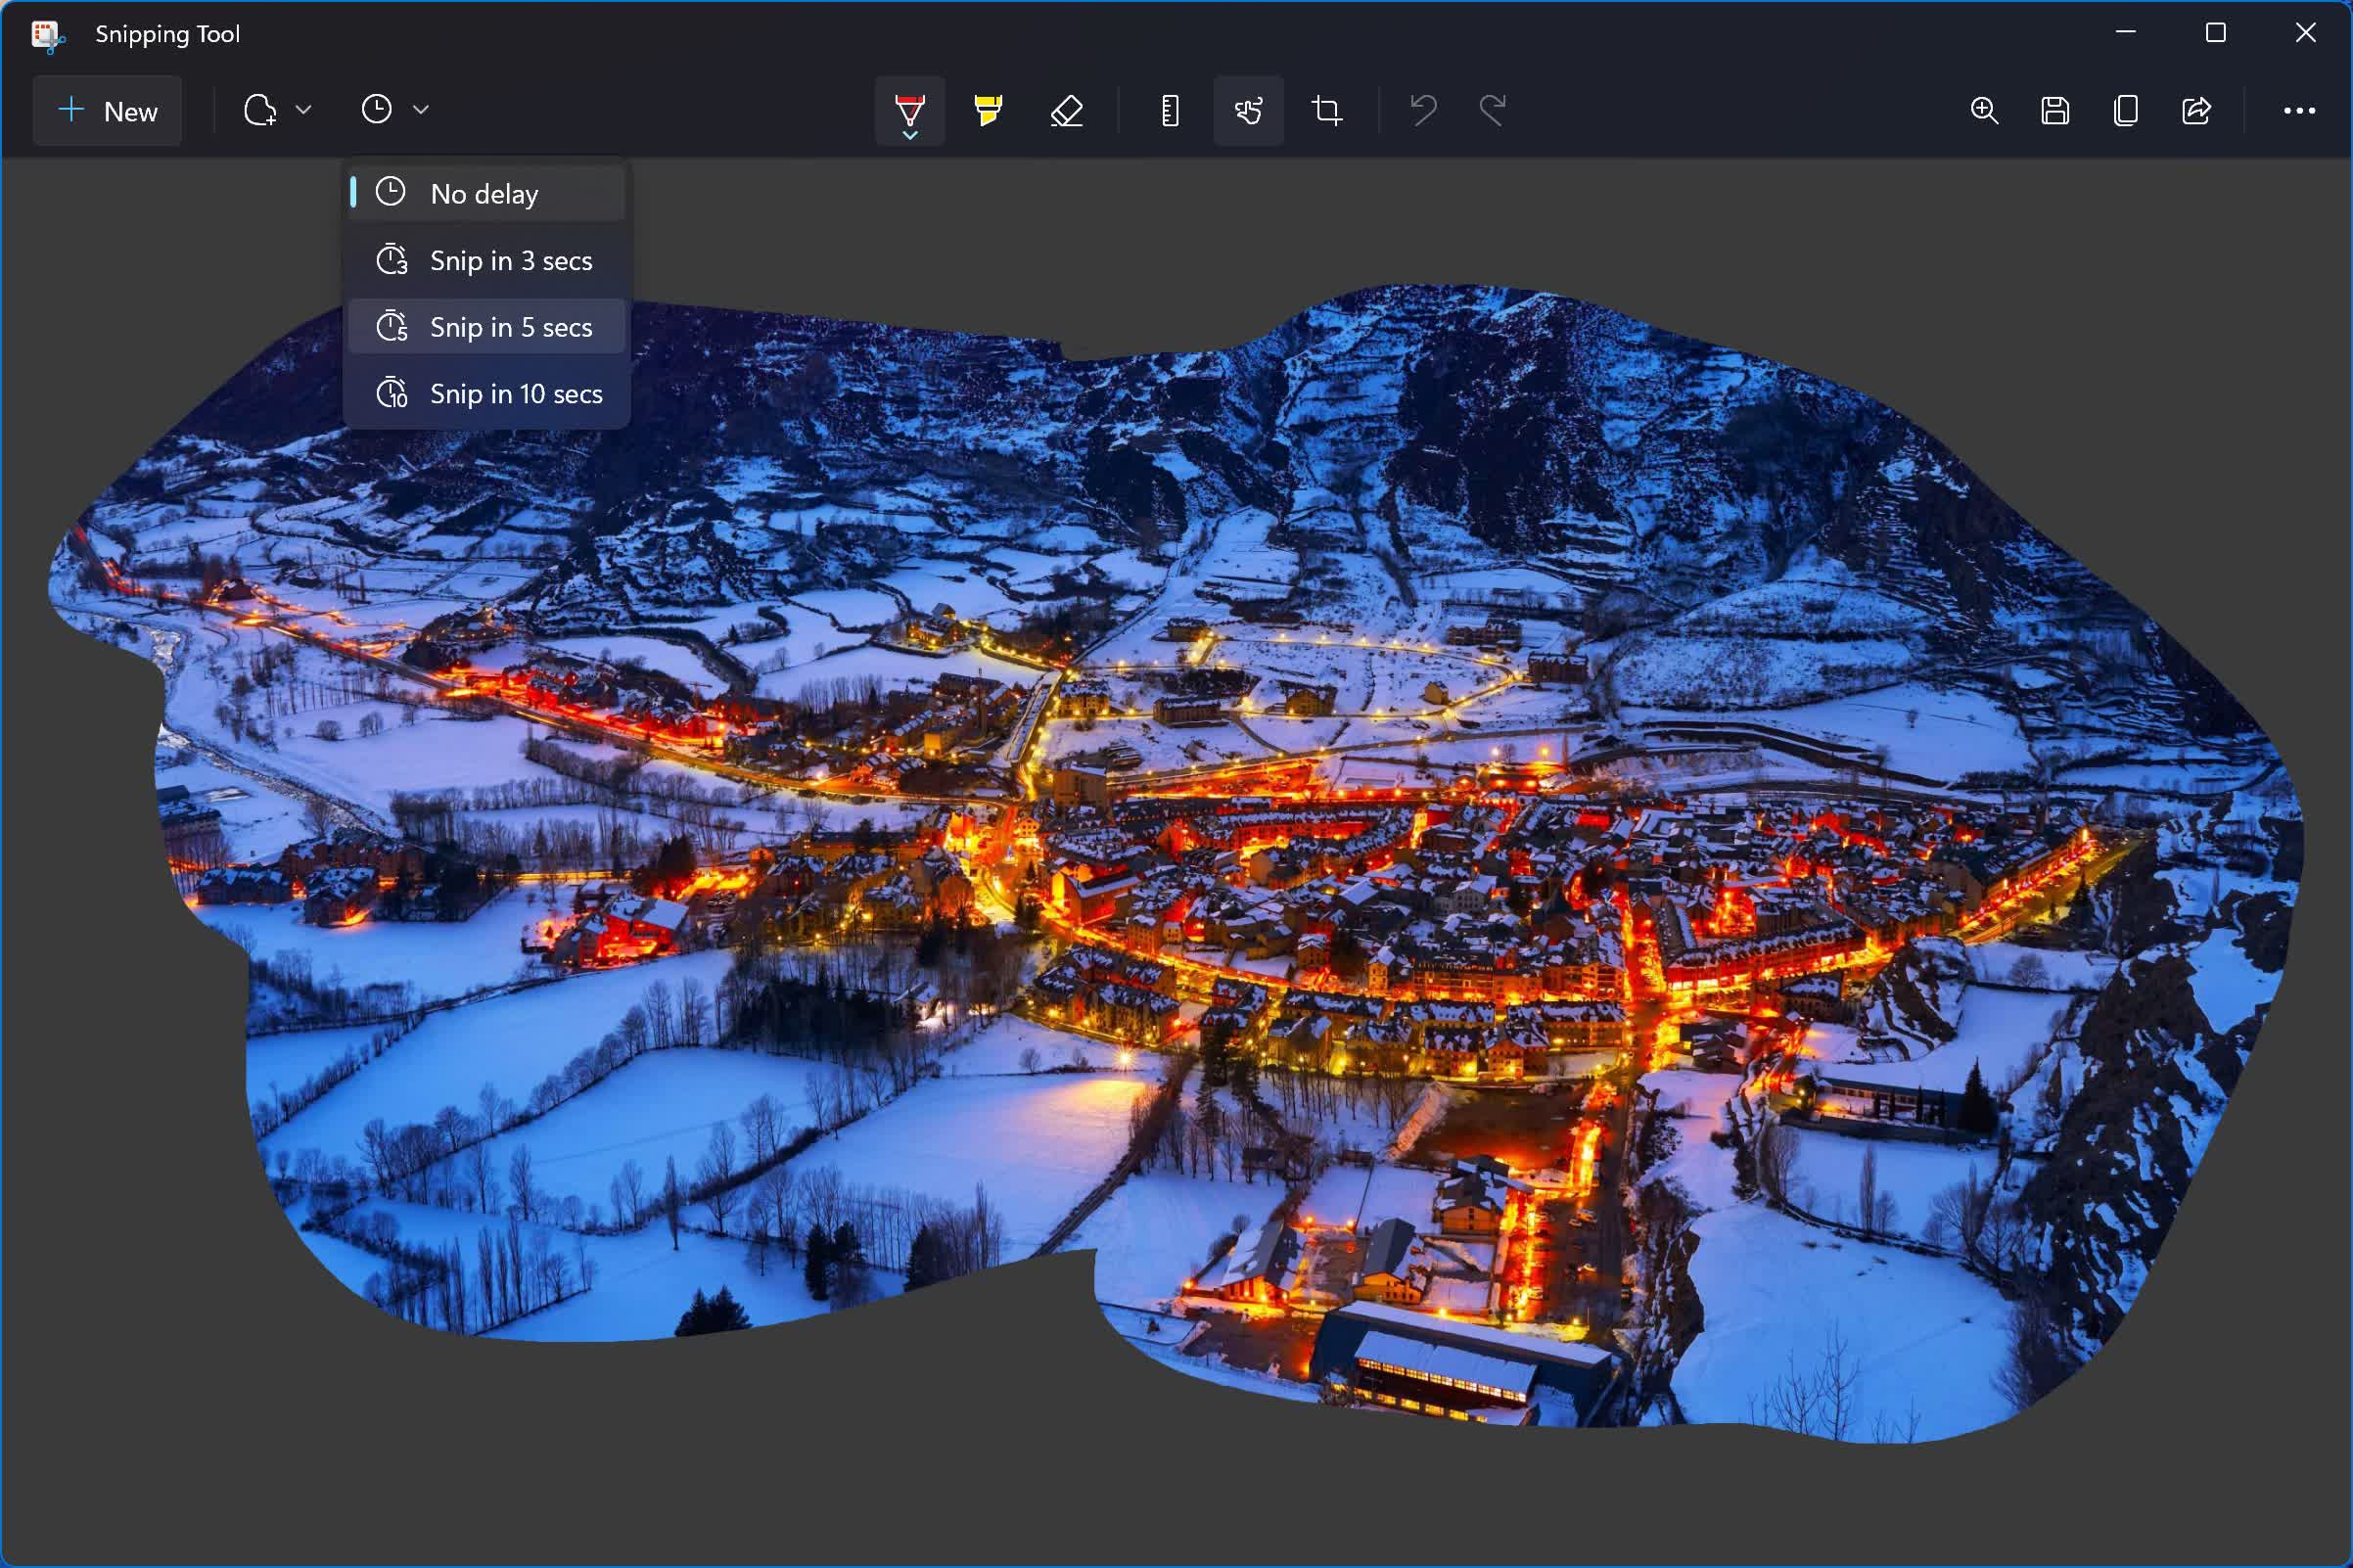
The Snipping Tool additionally permits you to do a timed display screen seize, which is helpful for tough conditions the place that you must take screenshots of pop-up menus or a number of dialog packing containers. Choose the specified delay after which carry out a snip such as you usually would.
Steps Recorder
Good for documentation
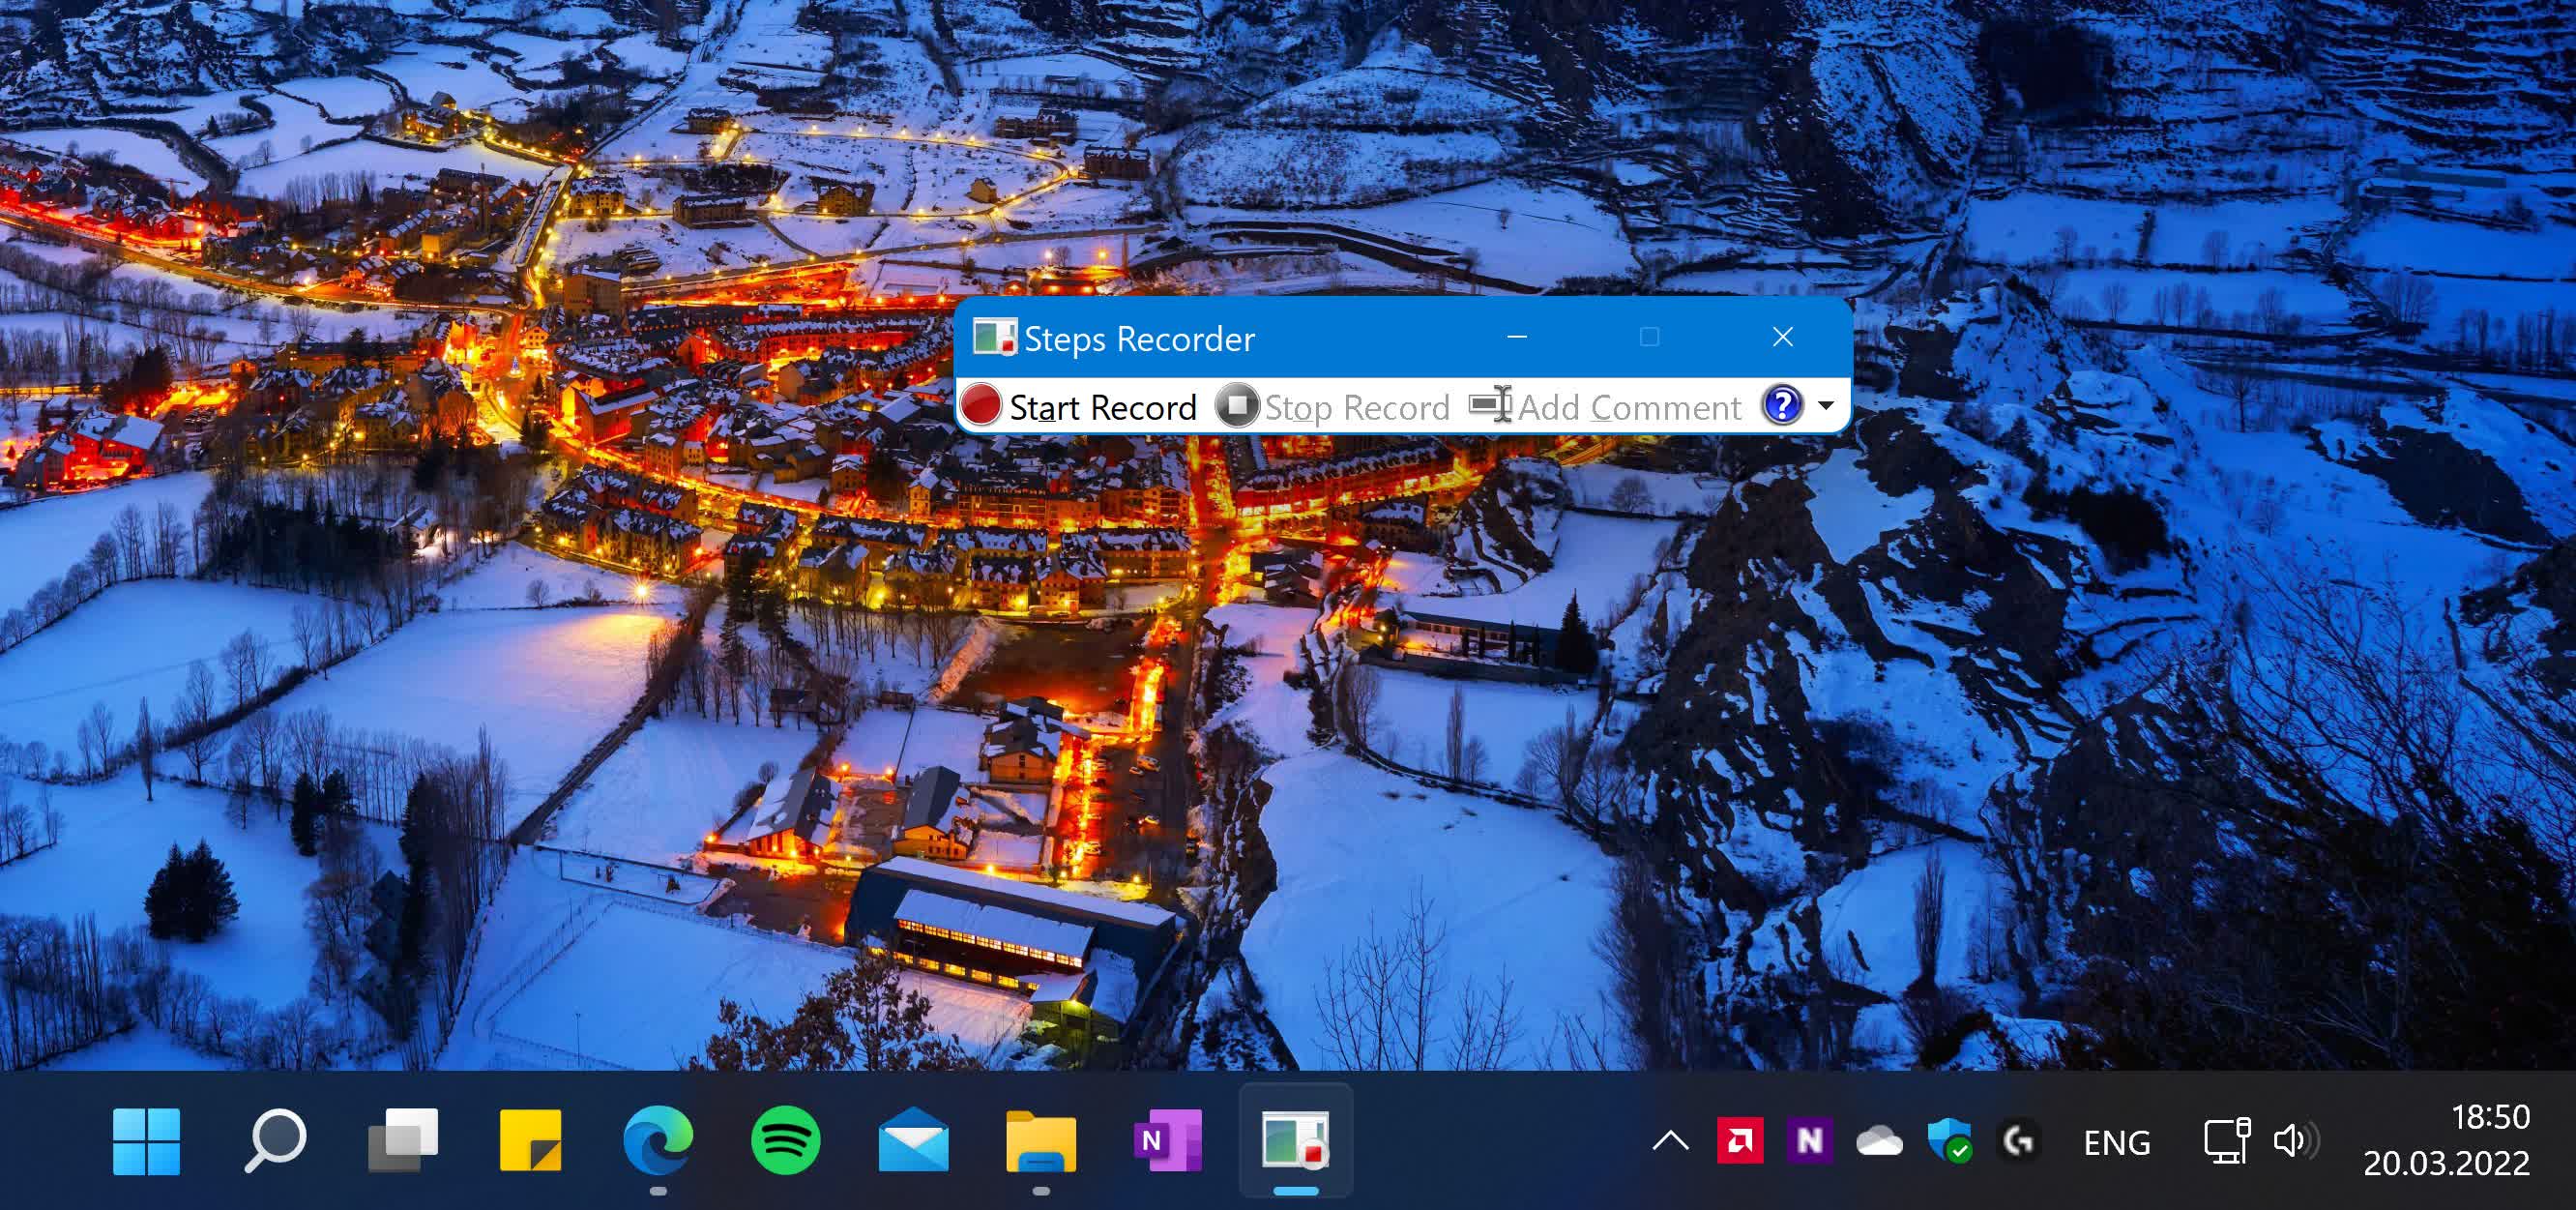
Another nice strategy to take screenshots is a little-known utility launched in Windows 7 referred to as “Problem Steps Recorder,” presently generally known as “Steps Recorder.” This one is a component screenshot instrument, half keylogger, and half annotation instrument, which could be very helpful when that you must reproduce or doc a sequence of steps whereas utilizing software program.
Look up the Steps Recorder within the Start Menu. From there, all that you must do is press “Record,” carry out the actions you need to seize on display screen, after which cease and reserve it as a zipper file you possibly can simply share with others.
Examples of actions embody clicking on one thing, opening apps, typing, navigating a menu, snapping a window to at least one facet of the display screen, copying a file, exporting your work from an app to a sure file format, and extra.
If you are still on Windows 7, you will not discover this utility on Start. Instead press Windows + R, kind “psr” after which press Enter. This technique additionally works on Windows 10 and 11.
Keep in thoughts that Steps Recorder will seize every part that is occurring in your PC display screen in nice element, so be sure to shut any unrelated apps beforehand. This will guarantee you possibly can isolate the problem you are attempting to doc, and likewise makes it simpler to troubleshoot by the particular person or group who will obtain your recorded steps.
You can pause the recording at any level, so you do not report any pointless info. During the recording you too can use the “Add Comment” button to focus on a bit of your display screen and add any notes about what is going on on that you just consider could also be helpful in troubleshooting the problem.
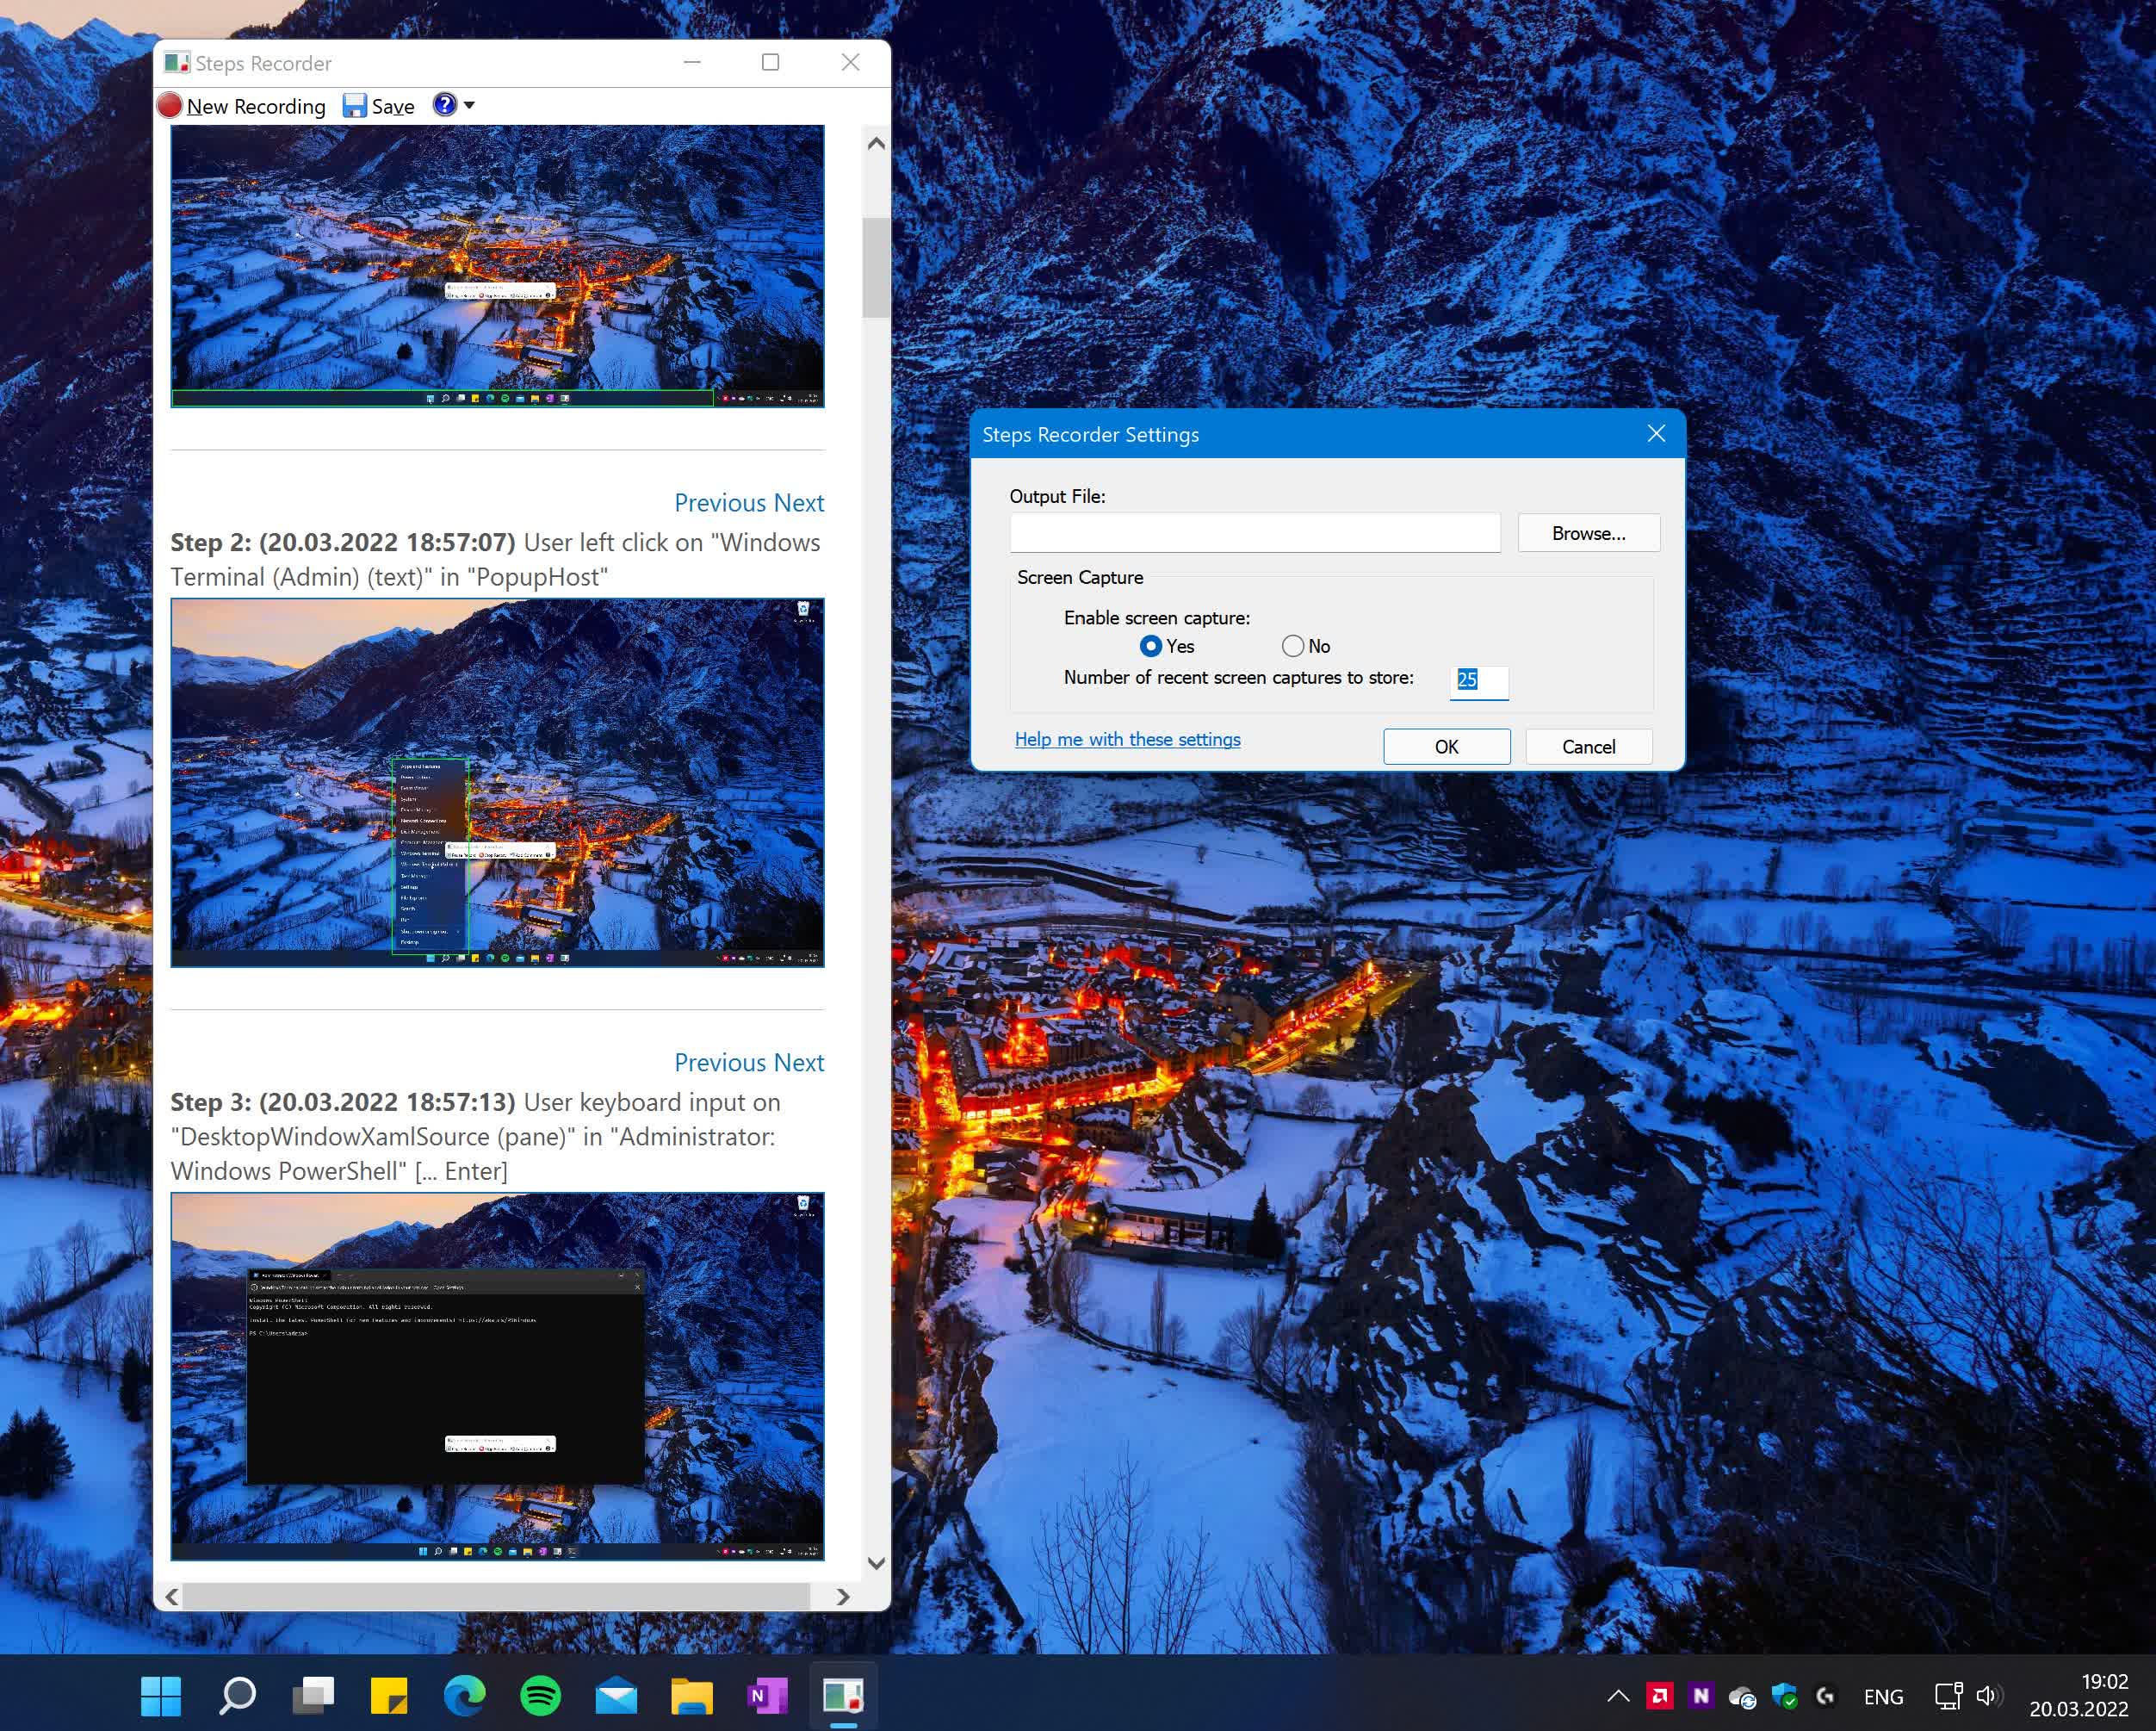
You can even regulate the utmost variety of display screen captures from the default of 25 to one thing above what you assume you will want.
When you cease the recording, you will see a window with the outcomes of the recording organized in an in depth report of what actions have been carried out on display screen, with steps accompanied by screenshots and the names, places, and the model of the apps that have been accessed. If you are pleased with the consequence and do not see any delicate info uncovered within the recording, reserve it as a zipper file and it will be able to share with others.
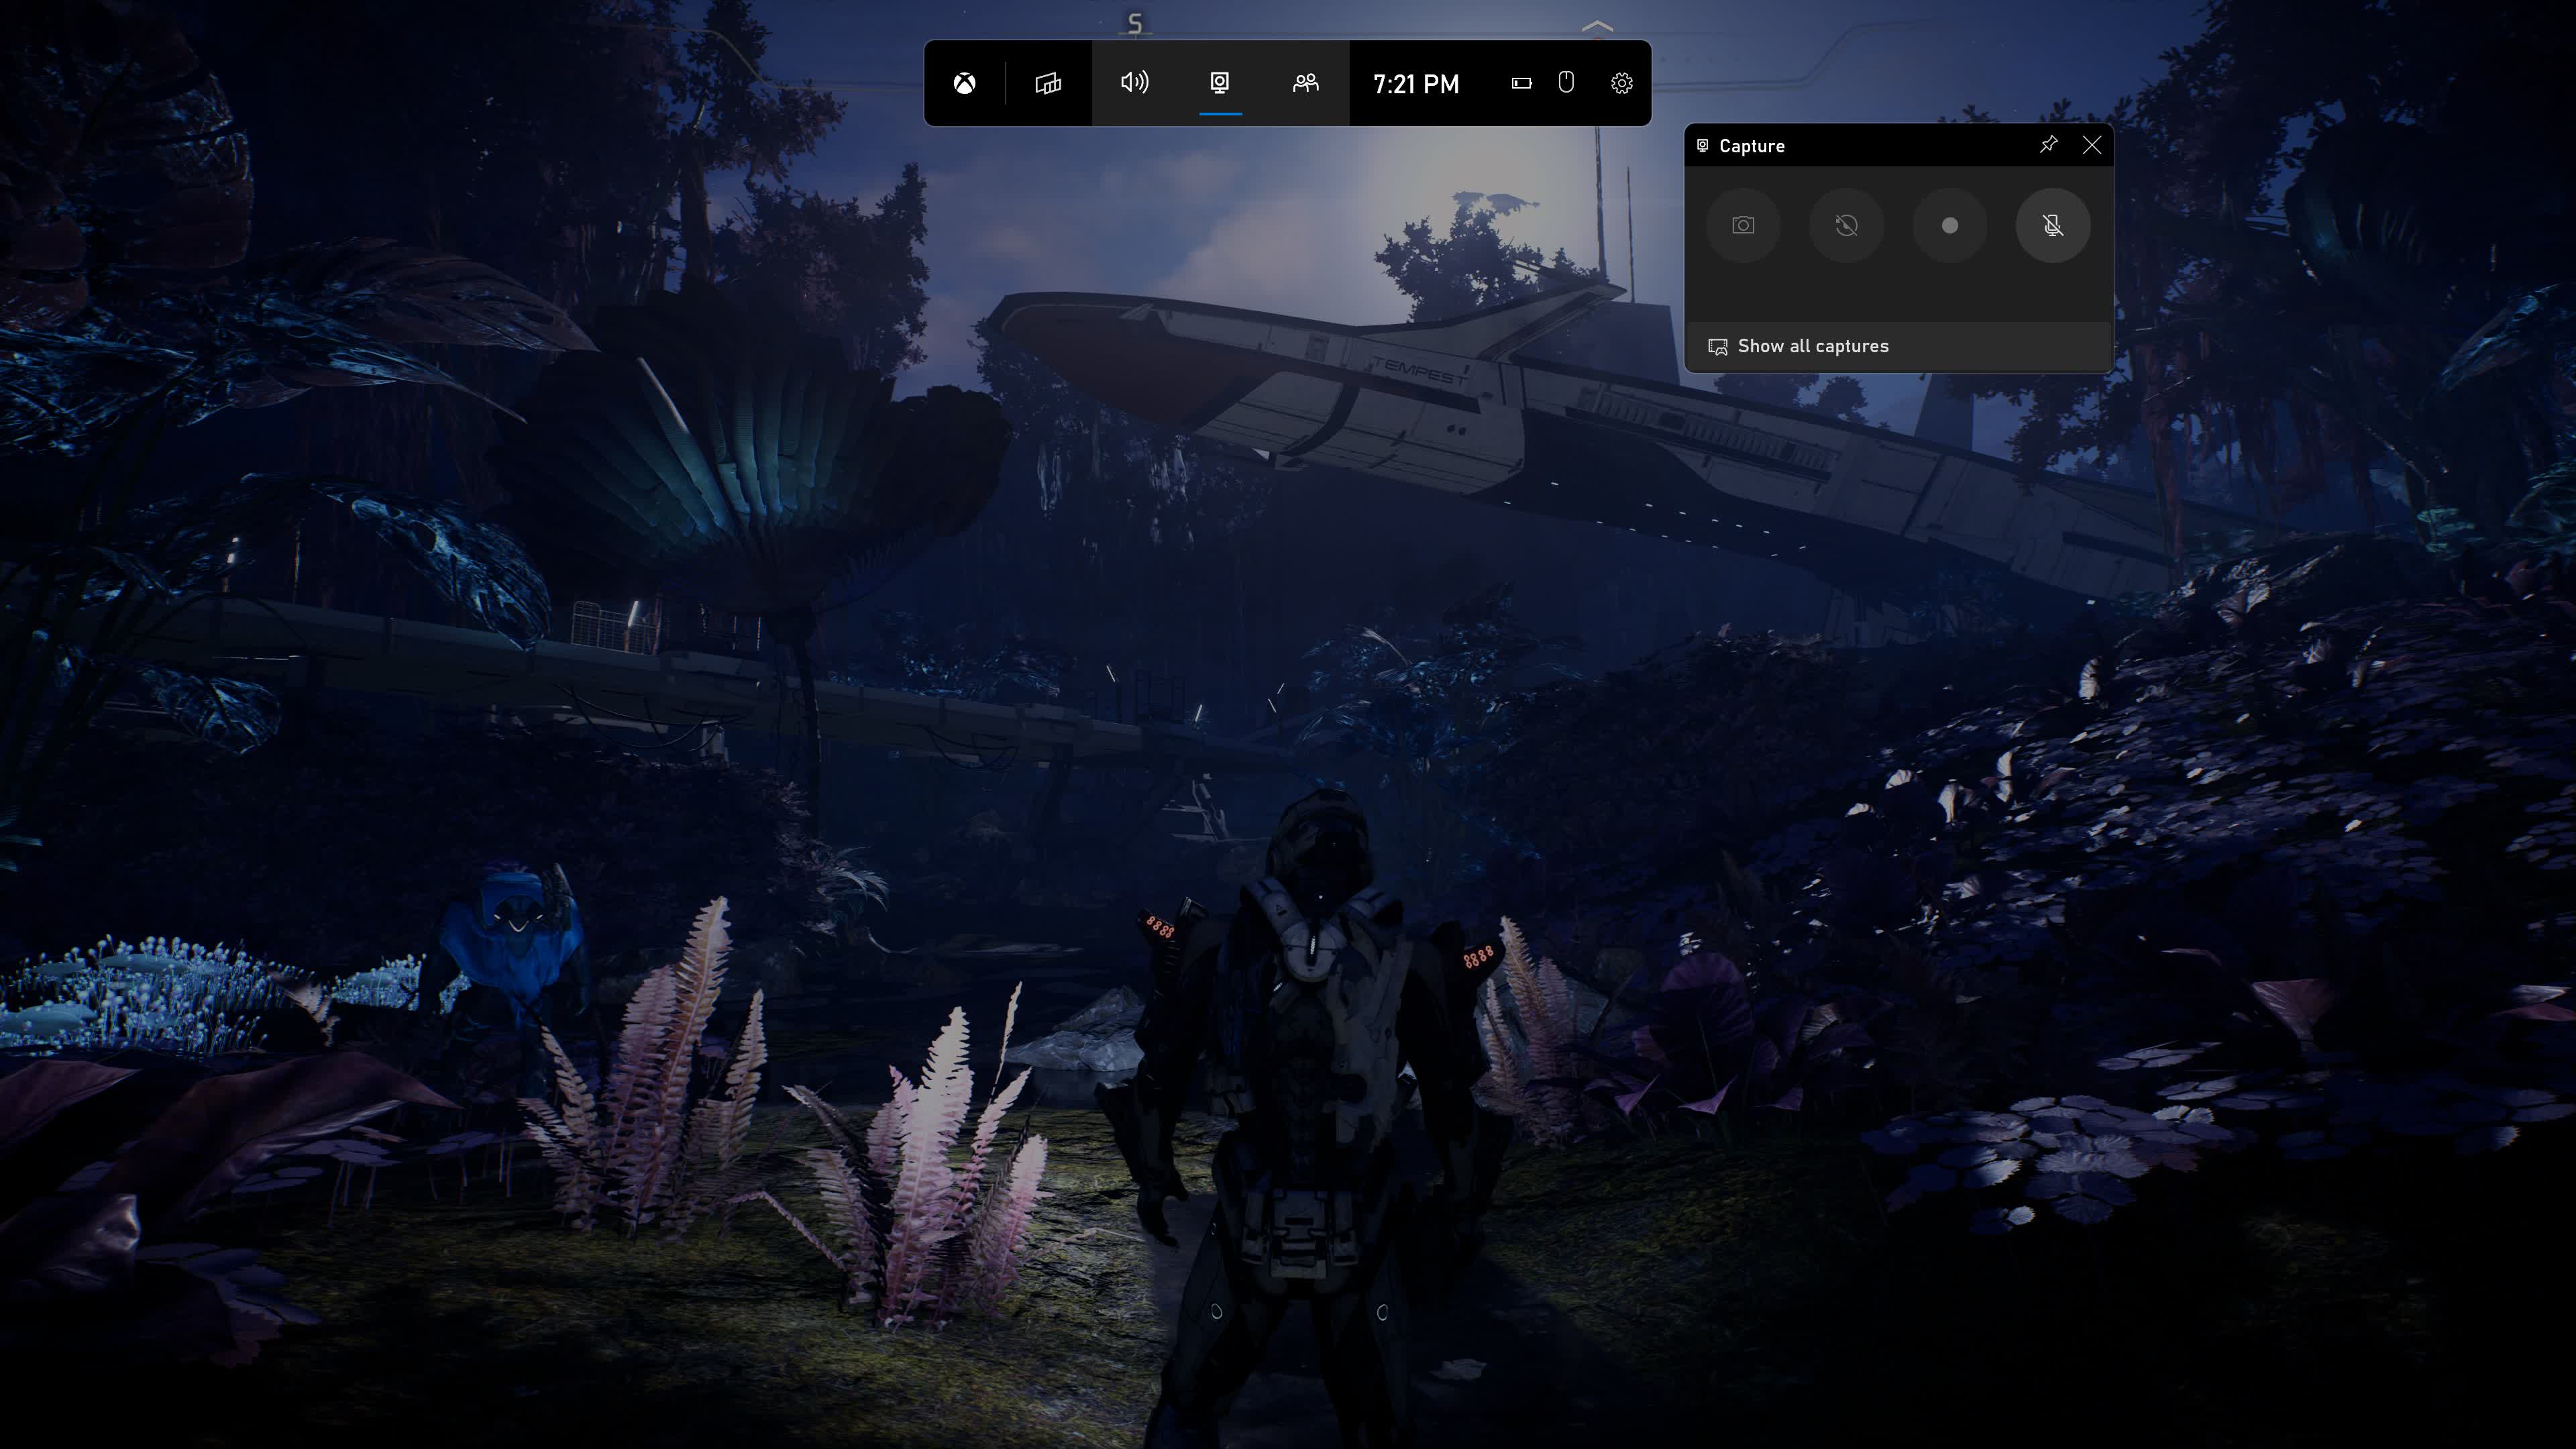
Xbox Game Bar
Another manner of taking screenshots is to make use of the Xbox Game Bar in Windows 10 and 11. The supposed function of this instrument is to seize bits of gameplay and chat with mates, nevertheless it additionally works for taking screenshots of a selected scene.
Pressing Win + G ought to pop up the Xbox Game Bar.
The important good thing about utilizing this technique is that your in-game screenshots can be saved to Videos > Captures folder, they will not combine with different display screen captures and can be organized by getting file names after the title you have captured them in.
Steam Client
If you are not an enormous fan of the Xbox Game Bar, you too can depend on the Steam shopper. Press the F12 key throughout gameplay to avoid wasting a screenshot, which can be confirmed with a small notification with a preview of the seize.

You will discover the ensuing screenshots by going to the sport’s web page within the Library part of the Steam app. It’s value noting that Steam can save your display screen captures as each .jpg and .png, so you may have some flexibility there.
Nvidia Ansel
For these utilizing an Nvidia GPU, the GeForce Experience app has a nifty instrument for taking in-game screenshots referred to as Nvidia Ansel. Not all video games help Ansel, however the record is rising and contains many widespread video games launched over the previous a number of years.
With this instrument, you possibly can pause the sport, regulate the sphere of view, and transfer the digital camera round till you discover the angle that appears one of the best to you.
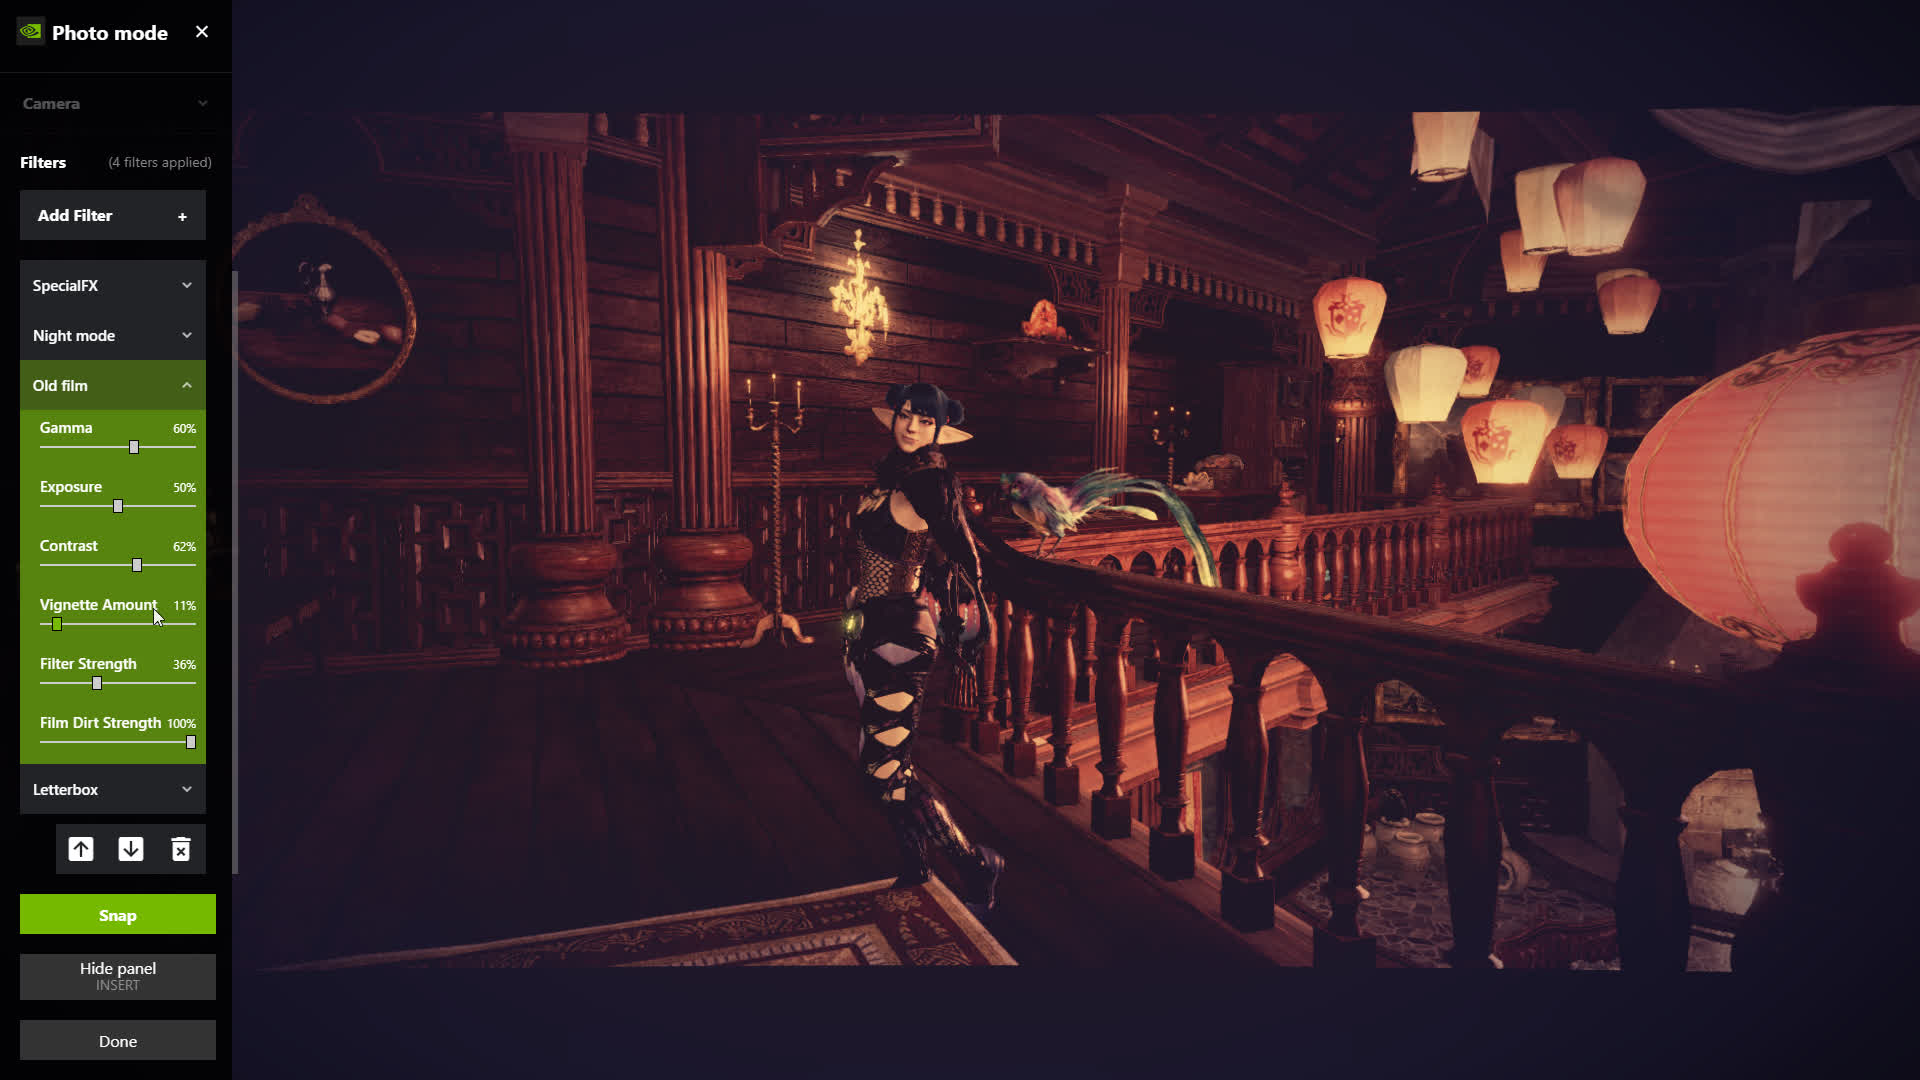
To use Ansel, press Alt + F2 to carry up the corresponding GeForce expertise overlay. Alternatively, you possibly can press Alt + Z and click on “Photo mode” to get to the identical interface.
From there you’ll apply quite a lot of filters, regulate the digital camera angle, and enhance the decision of the scene being rendered to effectively past what your monitor/laptop computer show helps natively. In some video games, you possibly can even create so-called 360-degree photospheres that may be considered with a VR headset.
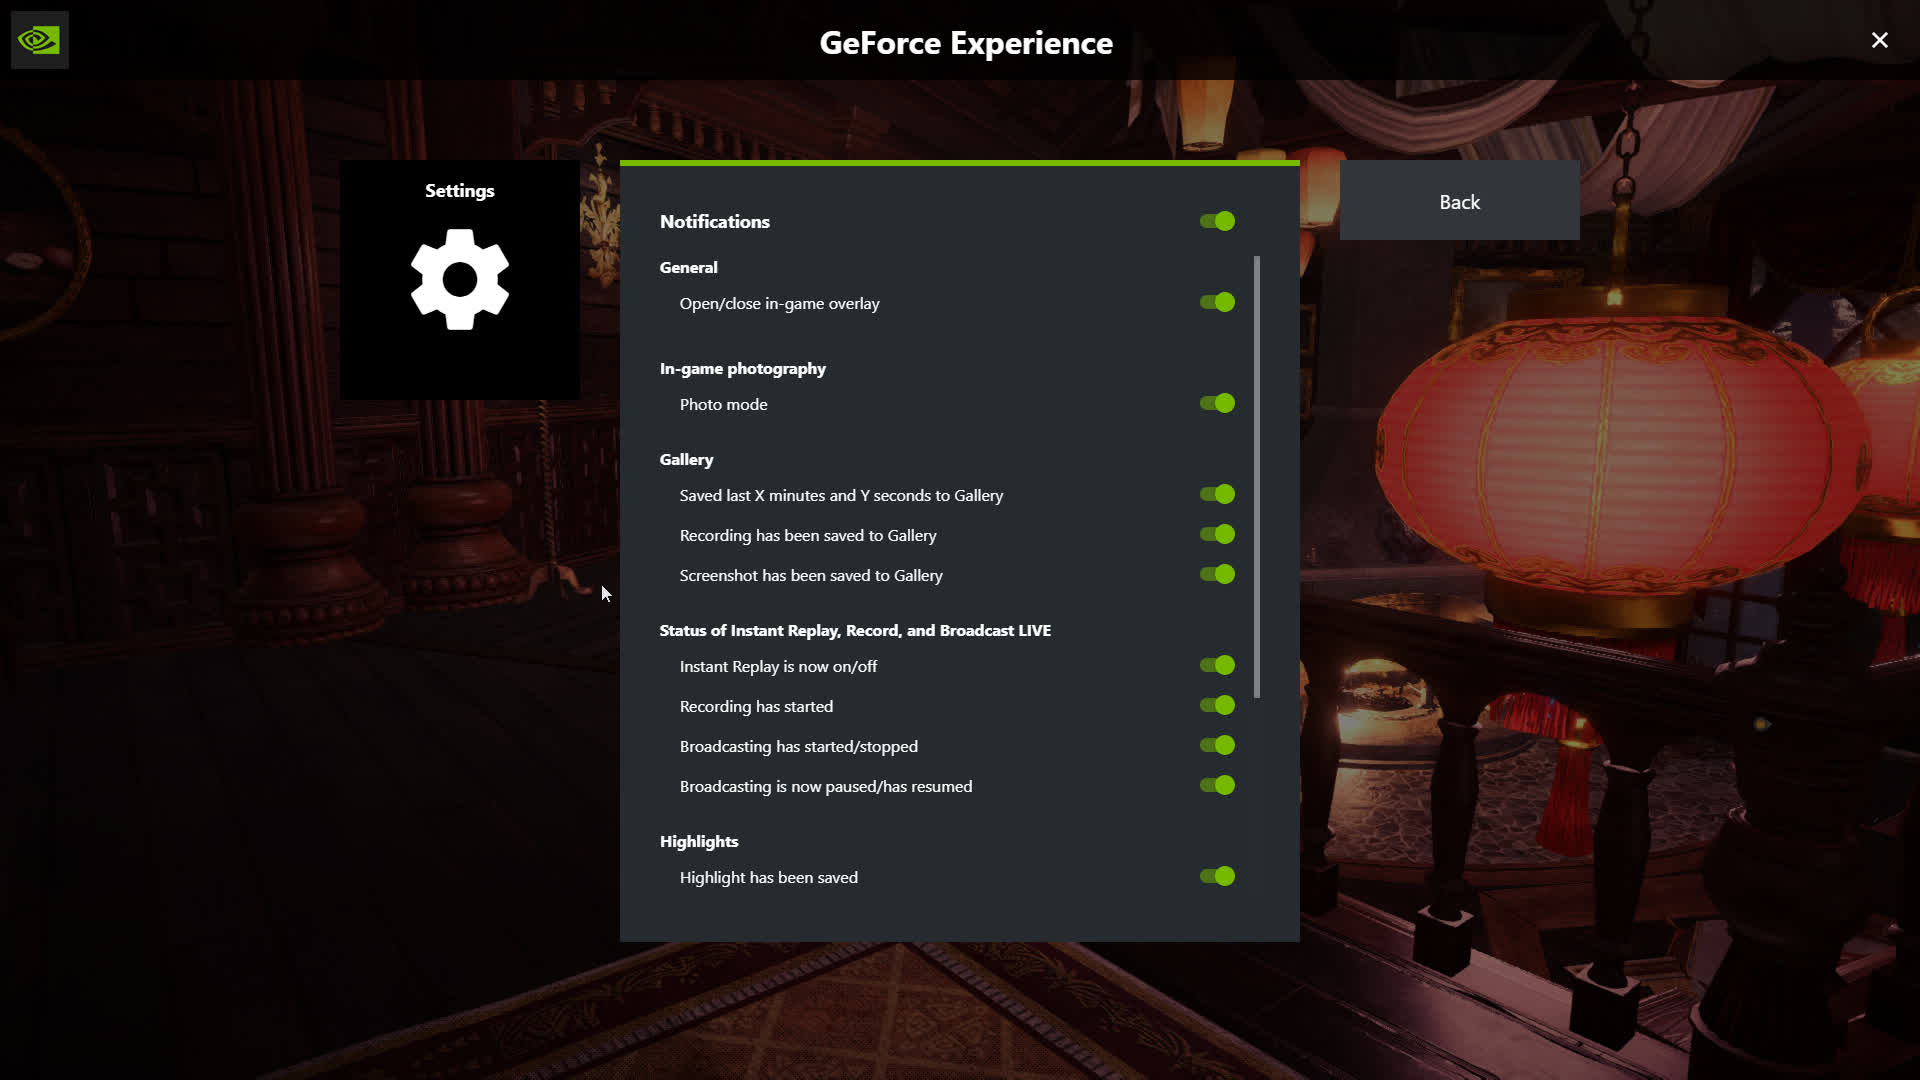
You’ll see a notification everytime you take a screenshot. If you want to make a number of captures in fast succession, it’s possible you’ll need to disable this notification within the GeForce expertise settings.
Taking nice in-game screenshots is an artwork, so naturally it is going to require some apply with tweaking varied settings and discovering the proper angle or viewpoint earlier than you obtain an important composition.
Third-party Apps for Taking Screenshots
There are a number of devoted third-party apps you should utilize to your display screen seize wants. These normally supply quite a lot of enhancing and export options that may prevent time and simplify your workflow.
If you are in search of a minimalistic instrument to seize screenshots and annotate in a snap, you must undoubtedly check out Monosnap. This one provides you a lot enhancing fundamentals like cropping and annotation in a light-weight interface that pops up each time you seize a screenshot.
While not as function dense as ShareX (see under), it really works for Windows and Mac, it is free for primary use and has some cloud capabilities which may go additional in the event you want them (for a charge).
ShareX is a extra highly effective instrument for taking, enhancing, and sharing screenshots, though its busy interface may intimidate first time customers. It can seize your display screen in quite a lot of methods, together with scrolling captures that prevent the difficulty of getting to sew collectively a number of screenshots.
You can even automate elements of your workflow with it, and it is easy to add your ensuing screenshots to quite a lot of companies together with Imgur, Dropbox, Google Photos, Flickr, OneDrive, Twitter, and extra.
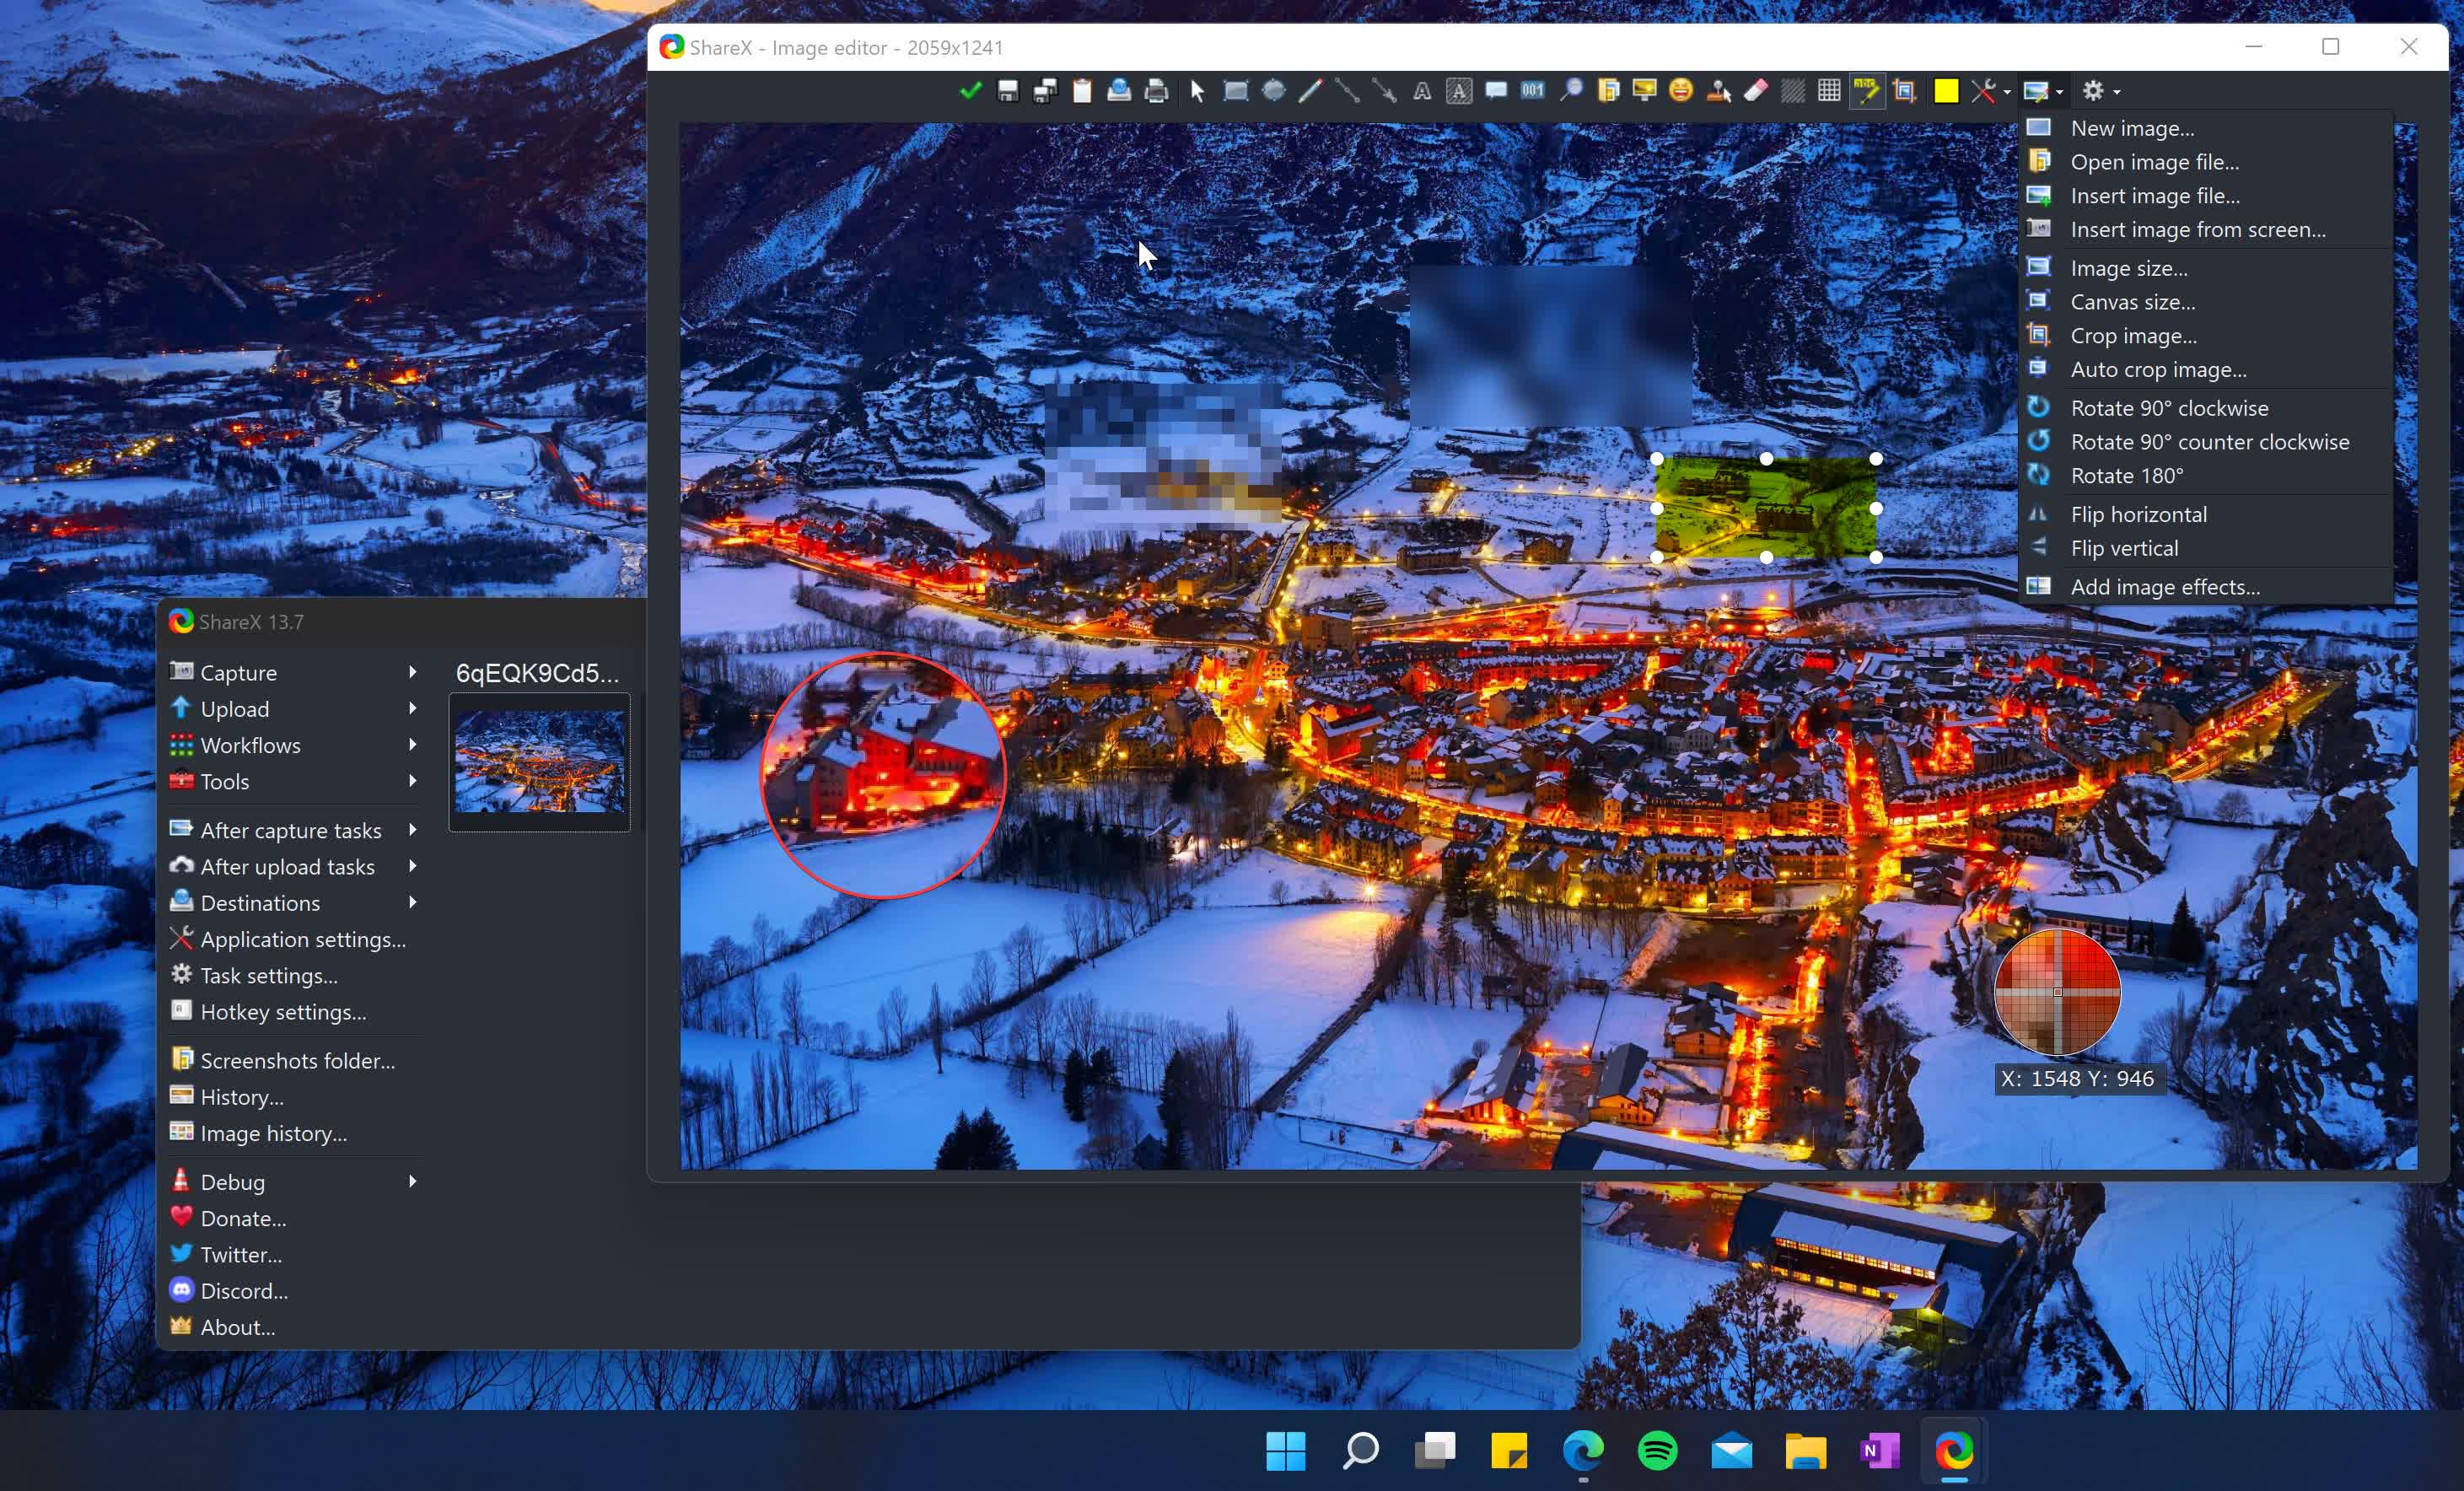
Once put in, ShareX will work with the default screenshot hotkeys in Windows. After making a seize, you may make quite a lot of edits with the built-in editor, every part from cropping, annotation and highlighting, to obfuscating delicate info by way of blurring or pixelation of a particular space.
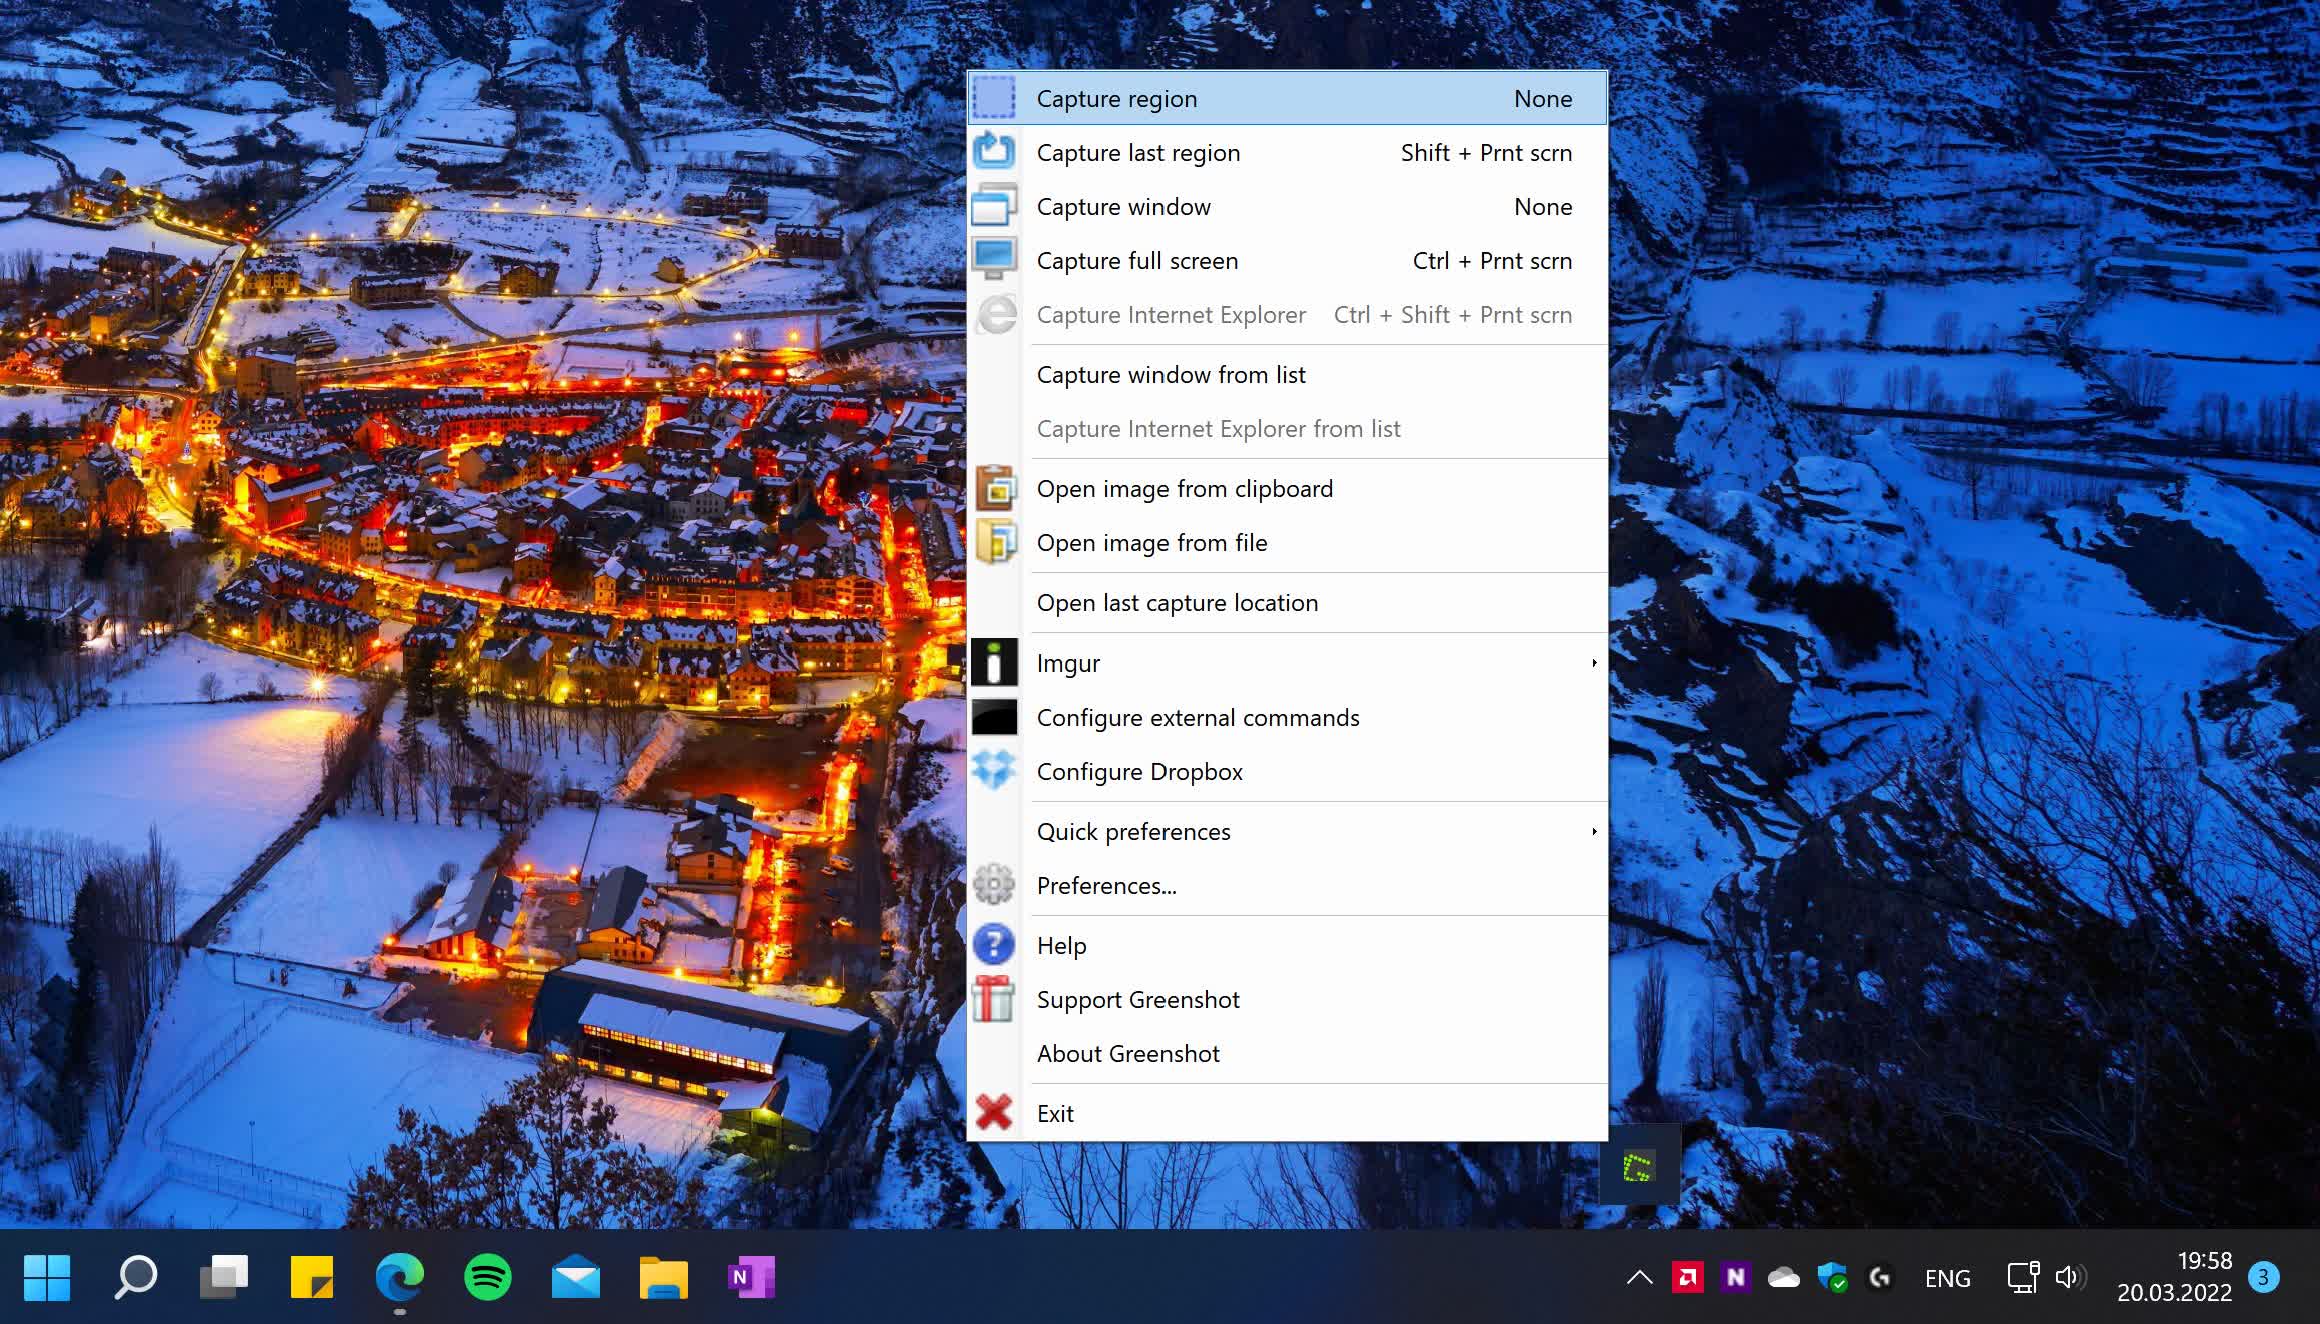
A 3rd app to think about could be Greenshot, a very long time display screen seize instrument for sysadmins and energy customers. It’s a comparatively light-weight instrument with a small reminiscence footprint. If wanted, it may also be added as a plug-in to Microsoft’s Office suite or instruments similar to Jira and Confluence. And like ShareX, when you end enhancing your screenshots you possibly can add the outcomes to companies prefer to Box, Dropbox, and Imgur.
Unfortunately, improvement round Greenshot has been dormant for a number of years, with some new indicators of exercise within the first few months of 2022. As such, you must proceed with warning as it’s possible you’ll hit some bugs on newer variations of Windows 10 in addition to Windows 11.
Bonus Tip for Tricky Situations
Some individuals take pictures of a pc display screen utilizing their iPhone or Android cellphone, which does not typically lead to nice trying captures. However, this unorthodox technique can show helpful when a PC freezes or shows a blue display screen with an error code, in addition to conditions the place you need to seize a digital whiteboard from one thing like a Surface Hub.
With the assistance of some apps, you’ll take a lot better screenshots, similar to Microsoft Office Lens (Android / iPhone) and Adobe Scan (Android / iPhone).

Both work in an analogous manner, in that they will let you level your cellphone digital camera at any show and seize clear photographs of one thing on it — an error code, an app window, a graph, a drawing, or one thing you’d been engaged on earlier than your PC froze on account of a technical difficulty. If the seize contains textual content, you possibly can even try to extract textual content from it.
[ad_2]